


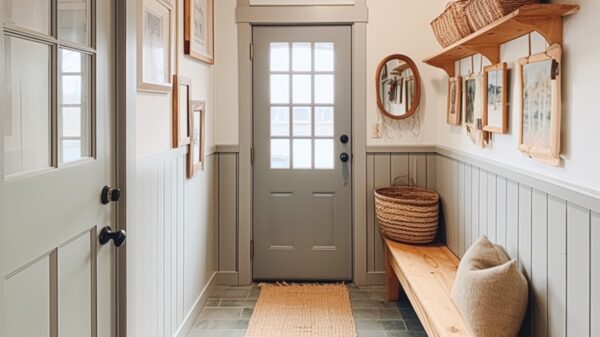


Should I Put Cedar In My Closet?
Most of the time a person’s closet is not lined with cedar wood. In many upper-scale homes, they are. Is this something you should include in your home?
Is it a good idea to put the cedar in your closet or is it a luxury? Yes, it is a good idea. Moths, cockroaches, and silverfish are deterred by the aromatic oils of aromatic red cedar, which has a sweet and fresh scent to us.
Cedar is one of the most popular closet materials now. Cedar is regarded as a species that prevents insects and offers a variety of additional advantages. Are cedar closets suitable for your home, though? Before you decide if cedar closets are appropriate for your house, there’s something you need to consider.
How Will You Transform Your Closet Into A Cedar Closet?
A person does not have to line the entire closet with cedar for it to work, but the more cedar you use, the better. It’s standard to line the three interior walls with cedar when installing cedar lining.
You may also consider covering the back of the door and on the ceiling as well. Some closets will have baseboard molding. Some homeowners may keep it in place as long as the baseboard is thicker than the cedar.
If you consider it, you can also get rid of the floor lining by first removing the baseboard using a pry bar. You can finish the closet with cove molding, which will conceal the rough ends of the boards. You may also utilize a cove to hide the small gap above the last course.
The raw cut ends of the boards will meet in corners of the closet, although as long as you begin your installation on the rear wall and cut the side wallboards to a length of a few inches less, you’ll have a good corner.

Highest-Quality Cedar Closet Installation
Miter joints are recommended for both their look and how well they form a tight fit. If you desire extra strength, consider adding small metal brackets at each end on top of the cedar board to add support. You can also add a metal hanger bar to any side wall no further than 24 inches from the rear wall.
When you install cedar in your closet, either lining or covering it, keep in mind that not all areas of the country experience the same type of climate. All climates are temperature and humidity controlled by the weather.
Thus, there is no heating or air conditioning system that will have an influence on these factors under normal circumstances.
Humidity in your closet can cause cedar to swell, possibly causing the cedar to split along the faces or at knots if they are not set properly during installation.
How Do I Set The Cedar Closet?
There are a variety of strategies to mount cedar on the walls. It may be nailed to the studs or fastened with construction glue. Adhering planks in place using adhesive and then nailing them is referred to as a two-pronged approach because it has two prongs.
You may also consider installing cedar planks with nails, then sealing them to prevent moisture damage. Since the adhesive is set, it doesn’t matter what position they are in.
If you avoid using construction adhesive on the back of the boards. Nails will drive right through the cedar.
Remember to remove the paper covering from your cedar boards and lay them on a hard, flat surface. Face-nail for an easier installation is recommended if you don’t want to see the nailheads. Then, once it’s in place, it will last years with just a quick, light sanding to rejuvenate it and return its woody aroma.
The Simplest Way To Install Your Cedar Closet
There are several ways to install a cedar closet in your home.
Find All The Studs In The Closet
Start your closet remodeling job by locating and marking the studs in the closet. The easiest way to find the studies is an electronic stud finder.
Alternatively, line up 16-inch increments along one wall of the closet, starting in a corner where there’s usually a stud, to estimate how many more studs will be needed. Make tiny holes at each location where you want to install cedar planks, then insert nails into them.
Once you have identified all of the studs and drawn lines around them, use a level turned vertically to draw plumb lines at each mark. To show you where to put the nails when installing cedar, draw line markings from floor to ceiling for each stud position.
Use a Pencil to Write On the Board
Begin at the rear wall. Use a line or slope, if present, to align baseboards and floors. Hold a cedar board with the tongue facing up at the foot of the wall. Place a level on top of the tongue and adjust the cedarwood.
To connect the two pieces of cedar board, cut a hole along the lengthwise axis. Lock it in position by cutting a hole along the long axis of one piece and aligning it to the largest gap between the cedar board and floor or baseboard.
Run the scribe’s point down the baseboard, across the gap, and along the top edge of the cedar board. Make a pencil mark on the second piece of cedar where it meets with this cut line. The second cut should be located between two studs, if possible.

Nail on The First Course
Put construction adhesive on the back of the board and press it in place from center to edges. Press it in place from center to corner to distribute the glue equally.
Fasten through the tongue at each stud location, angling them 45 degrees down so they don’t get in the way of the next board’s grooves when you lock it over the tongue.
The tongue-and-groove system lets you install the closet cedar just like flooring by sliding the tongues into grooves in adjacent boards.
If your tongue is too long to fit, trim it with a saw and sand the cut with an 80-grit belt sander attached to a drill/driver.
Continue On
Cut the boards to fit after measuring the length of the wall and installing each row with a miter box and handsaw. Many boards have a rabbet on either end, allowing them to fit together with the next board in line.
If feasible, start each row with an off-cut of one board; this ensures that the two boards interlock. Squeeze out a line of adhesive to the back of the board. To fit them together, tip the groove of the board over the last row’s tongue.
Check for level and make any necessary changes while the glue is still wet. Nail the board in position. Install the next board until the back wall is completely covered. Then install the cedar on the sidewalls, hiding the cut ends of the boards at the corners.
Make sure that each row of boards aligns with one on the rear wall; otherwise, mismatched seams will appear twisted at the corners.
Adding The Last Board
If the remaining gap is greater than 1⁄4 inch but less than the width of a board, cut down the boards to accommodate it. Subtract 1/8 inch from each end to ensure that the trimmed board easily adjusts upright. Record the measurements on the board and then rip it with a jigsaw along the tongue side.
Nail through the board’s face near to the top of the wall after it has been tipped over onto the previous row’s tongue.

Make Sure The Edges And Moldings Are Finished
Prepare your router table. Secure a cove molding piece to the top of the back wall with the miter box and handsaw. If you’re using two pieces to span the wall, use a scarf joint to connect them at a 45-degree angle.
Attach the molding to the top of the wall framing by driving brad nails through it and into the top of the wall frame. Cut a piece of the cove with a 45-degree miter at the end that will go in the corner. Set up the miter so that the long point is on the back of the molding. Make a sloping back cut with the coping.
Make a small back cut with your saw, angling it about 5 degrees to produce a cosmetic edge, utilizing a coping to produce a sloping back effect. The blade may bind from time to time. Before resuming, work your way back out of the saw and make a relief cut from the edge before proceeding.
Inspect the coped portion against the molding on the rear wall after you’re done to verify that it’s level. Then nail it in place using nails. You will repeat the steps on all other walls.
Install the wall’s lower molding in the same manner as it was built and install cove molding along the bottom of the wall.
Remember…
When you install cedar closet lining, the process is simple since the cedar planks or plywood panels. Then attach to the inside of your current closet and no additional framing or carpentry skills are required.
You’ll also need to be able to cut and measure the panels or planks with accuracy. There is a needed experience with using a hammer and nails or a pneumatic nailer and air compressor.